Nessus - a sensational vulnerability scanner and beyond

What if a tool automatically tells you about the vulnerabilities of a system? I bet you would love this. You have already explored various manual ways to do information gathering. It’s time to present you with a swiss army knife for information gathering: Nessus Vulnerability Scanner.

Ohh! Have you completed the last article’s to-do? I hope you would have checked the ports of various websites (I know the curious you :P). In case, you have found something vulnerable, remember this:
CAUTION: You need to make sure that you will not use this information for any illegal purposes. This information is being shared for educational purposes only. If you find something sensitive while practicing this, do not use that information instead inform the website owner as soon as possible.
What is Nessus Vulnerability Scanner?
Nessus is one of those vulnerability scanners that is used during penetration testing and vulnerability assessments. This tool basically checks for vulnerabilities that a hacker can exploit. It works by testing each port of the server, determining services running on that server, and testing there are no vulnerabilities that could be used by a hacker for running a malicious script. Nessus can scan for the following vulnerabilities:
- Misconfigurations
- Denial of Service(DOS) vulnerabilities
- Default, common, or blank passwords
- Vulnerabilities that allow unauthorized access
Why Nessus is called the swiss army knife?
There are significant capabilities of Nessus:
- Can test local or remote hosts
- Detects missing security updates and patches
- Can perform internal network scans
- Can schedule security audits
- Simulated attacks to pinpoint vulnerabilities
How to run your first vulnerability scan?
Step 1: Download and Install Nessus
Download Nessus as per your system. Register yourself on this website(to get an activation code to install it). Nessus has 2 versions: Professional(for educators, teachers, etc when you need it professionally) & Essentials(for your individual use). Choose essential for now and install it. Installing will take a little time(if you know you know).
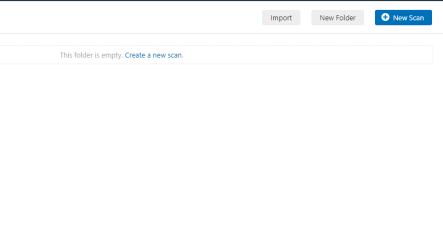
Step 2: Create a Scan
Once you have installed it, launch it. To create a new scan, click on scan in the navigation bar and then the new scan and choose Basic Network Scan(you can choose others too).
Step 3: Configure settings
Now you need to set up scan settings. This is about setting the configuration and policies for the scan. Enter the details about your target in Basic. Use IP for scanning, not the domain or URL otherwise, it will throw an error. In the configuration, you allow using proxy and some predefined policies or you can create a custom policy.
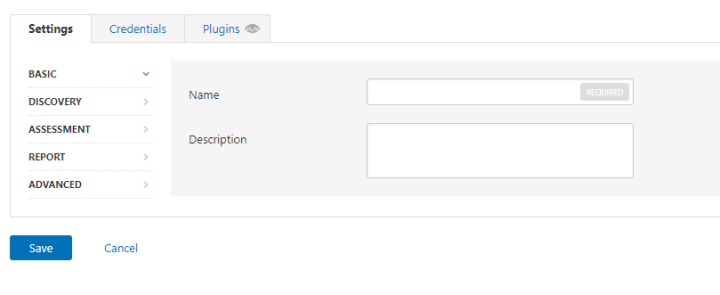
For example, let’s create a policy for the windows system. In the navigation bar, click Policy > +New Policy. Choose a type of scan(say Basic Network Scan). A similar screen will popup:
Tweak some of the options as per your requirement. Let’s talk about a few which is helpful in penetration testing, the rest I’ll leave on you to explore.
- Safe Checks: You should enable this. It runs a low-risk scan so that your scan doesn’t break the system. If not enabled, this can break the older systems by denial of service.
- Silent Dependencies:
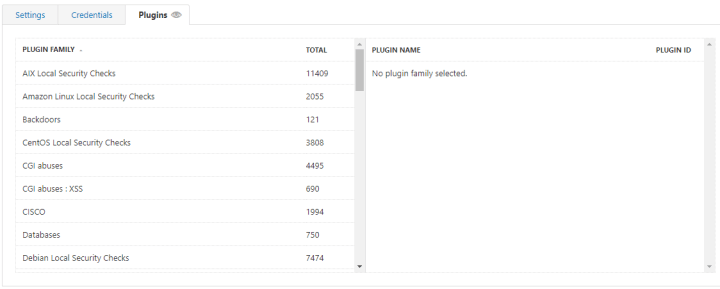
- Credentials: This option allows you to specify credentials of specific FTP, HTTP, and others. This helps to perform an depth analysis of the target
- Plugins: This tells you about what kind of vulnerabilities it will look for. Here you can see Nessus has a huge database under every kind of scan.
Do share in the comments if you have more settings to make the testing better.
Step 4: Launch Scan
Now, click on save and it will take you to the My Scans page. Now launch your scan by clicking on the play button in front of the name of your scan.

The work is done, just wait for the scan to complete and then view results for finding potential risks. In minutes this will do all the work which you have learned till now in the roadmap, probably the more of it. There are advantages of using automated tools — they are quick, updated, and fast. But, there are some downsides too:
- You won’t make recons anymore by yourself. Your practice will stop.
- The latest vulnerabilities updates take time to reach the tools.
That’s why you’ll have to decide the trade-off between manual and automation. They both are good in their own terms like if it’s repeating use the automated way or if you want to go into depth try the manual way first. Let me know your thoughts in the comments below.
Here comes your:
To-Do
- Understand different options in Nessus
- Try out Nessus in a simulated environment of yours
and don’t forget the caution shared above. Here, we come to the end of the article. Keep practicing till the next one. In the coming article, we’ll talk about the loopholes of a network.